In this blog post we will explore the basics of the TMC API using the Talend API Tester by running a Task using a temporary Service Account token generated with the oAuth2 Client Credential Flow.
Talend Studio is used to visually design and build the job which is published to a repository hosted in the Qlik™ Talend Cloud. Talend Management Console is used to manage, schedule, configure, and monitor Tasks which run the Studio jobs on Remote Engines.
But scheduling is not the only mechanism for running Tasks. Sometimes it is desirable to trigger Tasks in response to an external event. For example, a Task might be invoked whenever a file is dropped in a folder or perhaps in an S3 bucket. Or maybe the Task needs to be triggered as part of a larger workflow in another application.
In these cases, the TMC API can be used to flexibly invoke the Task. The TMC API also has the advantage that it can pass parameters from the REST API call as a context variable to the underlying job represented by the Task configuration. Using the TMC API is more flexible than a scheduled Task which must run a fixed configuration on a fixed schedule.
The TMC API is quite powerful, and with it you can automate any task that you can do interactively via the TMC in the browser. There are some excellent examples in the TMC API Use Cases documentation. A very important use case is Using a Service Account to Run Tasks. The example in the documentation assumes that you have a Service Account token and that you have the Task Id of the Task you want to execute. In practice you need to make additional API calls to generate a Service Account Token and to get the Task Id given the human readable Task Name.
In this blog post we will explore the basics of the TMC API using the Talend API Tester. The Talend API Tester is a Chrome plugin that allows you to create and manage Requests against REST endpoints that have an Open Application Specification v3 (OAS v3) contract. This was previously known as a Swagger contract. OASv3 is a broadly accepted standard for expressing service contracts and is comparable but much simpler than the older WSDL for SOAP based service consumption. The Talend API Tester is included as part of the Talend Cloud and is accessible from the Same Talend Cloud UI.
We will make an initial API calls to retrieve the Environment and Workspace Id. Then we will make a second API call to get the Task Id given the Task name. Finally, we will invoke the Task using its Task Id. Initially we will authenticate using a User Token.
We will then extend this example to make some oAuth2 calls to retrieve a Service Account Token which will be used instead of the User Token.
Pre-Requisites
You will need an existing Environment and a Workspace for which you have Execute permission and View permissions. If you are creating a new Job which you will publish to the Workspace you will also need the Publish permission. In order for your user to be able to be granted these permissions, they will need to have the Operator role. If you do not have this role, ask your administrator to Assign this Role to you.
There must be a Remote Engine associated with the sample Workspace or Environment.
You do not need Studio permissions if a job has already been published as a Task to TMC. But if you are creating your own job in Studio then you will need the Integration Developer role.
Rather than using your personal userid and password, you should create a Personal Access Token.
A Service Account can be created by your Administrator or other privileged user. If you are doing the Service Account examples, verify that your Service Account has access to the Target Workspace. It needs the same Execute permission and View permissions on the target Workspace mentioned earlier.
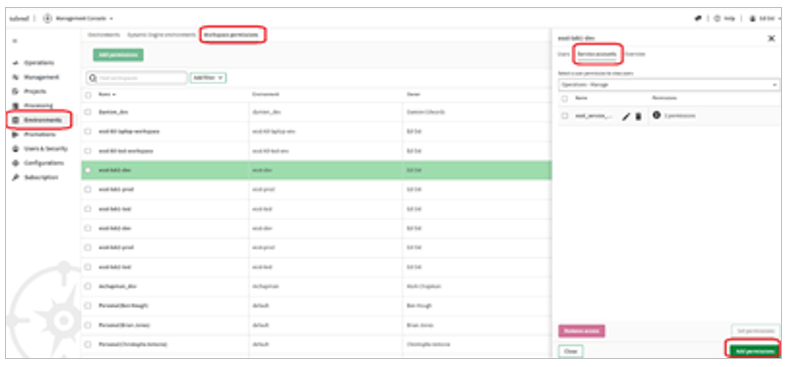
Below is a screenshot of how your administrator can add Workspace permissions for your Service Account. Initially the Service Accounts tab in the right-hand pane may be empty. Clicking the Add Permissions button will allow the administrator to select the Service Accont and select the appropriate Execute and View permission.
You will also need a sample job which has been published from Studio and configured as a Task in TMC that runs in the target Workspace.
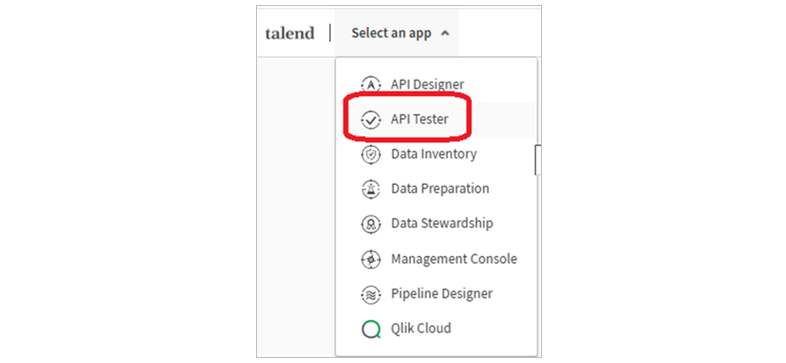
In order to the examples, you will need the API Tester role. This will allow you to launch the API Tester from the TMC.
Importing the TMC API Into API Tester
The TMC API Reference is available at https://api.talend.com/apis/. We will be using the Orchestration and Processing API’s.
Extracting Orchestration Services
Click on the Orchestration API. It takes you to the OASv3 UI representation. Scroll down and inspect the Workspaces -> List Workspace operation. It is a simple Get operation. Note the Query parameters that allow you to specify filter criteria. It is self-explanatory with name referring to the Workspace name and environment.name referring to the Environment to which the Workspace belongs.
Click on the Try in API Tester dropdown and select the region in which your TMC is located. Now click on the Try in API Tester link.
You will be taken to the API Tester where a new API Tester Project called Orchestration 2021-03 will be created. There is a folder for each section of the API in the left-hand pane.
Expand the Workspaces section folder and you will see four operations including the List Workspaces operation. Select the List Workspaces operation and the right-hand pane will show a display a form for populating the request parameters based on the OASv3 specification.
You can modify the input parameters including query parameters, headers, and the body to submit individual requests directly to the API. However, we are going to create a series of requests as a Scenario.
Before we can create our new Scenario, we need to create a separate Project to store it in. We will be using operations from multiple TMC Services, so it does not make sense to store our Scenario in the project of an individual Service.
Click on the ellipsis context menu of the root My Drive folder and select Add a Project.
A new project with an empty Scenario 1 will be created.
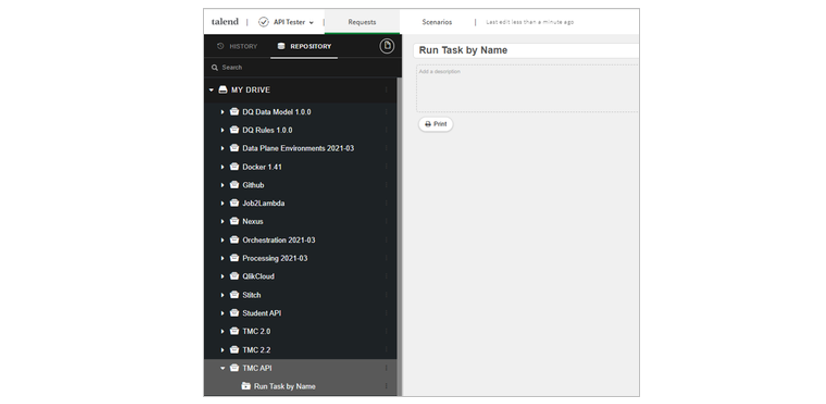
Select Scenario 1 and rename it to Run Task by Name.
Now return to the Orchestration project and click on the ellipsis and select Extract to Scenario.
A dialog box is displayed for you to select which operations from the current project you want to include in the Scenario. Select both the Tasks -> Get Task Executions and the Workspaces -> List Workspaces operation and click Extract. The screenshot below only shows one of these because of the scrollbar but be sure to select both.
Another dialog window asking which Project you would like to create the new Scenario in. Select the TMC API project you just created.
Caseta de dialog se va actualiza pentru a afișa noua cale către proiectul selectat. Acum selectați scenariul Run Task by Name.
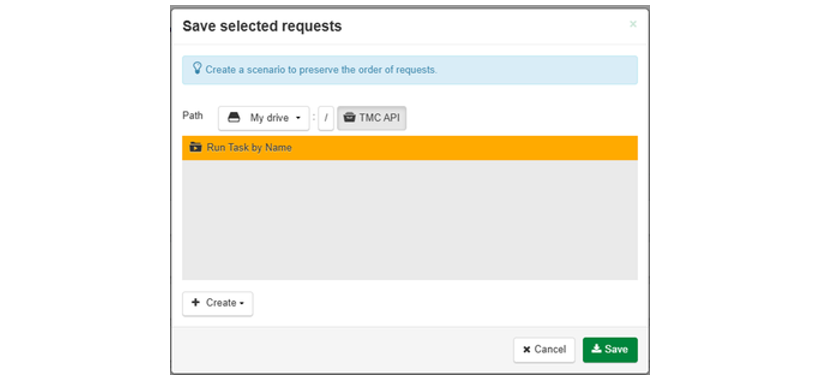
The path is updated. Finally click Save.
The Get Available Task and the List Workspaces operations are copied into the new Run Task by Name scenario folder.
Extracting the Processing Services
We need one more API operation for our Scenario. Return to the API documentation page and click on the Processing service.
Select your TMC region endpoint and then click Try in API Tester. It takes you back to API Tester and informs you that the new Project is named Processing 2021-03.
Open the Processing 2021-03 project and click the ellipsis next to the Task Executions Service and select Extract to scenario.
Since we selected just the Service rather than the whole Project we get a smaller list of Operations to export. Select the Execute Task operation and click Extract To.
Navigate to the TMC API project and select the Run Task by Name scenario as before and click Save.
The Execute Task operation is added to the Scenario. Select the Run Task by Name scenario in the left-hand pane and then click the Scenarios tab at top to switch to a more detailed perspective.
All three Operation Requests were added to the scenario, but they are not in the correct order. Use the up and down arrows on the right to change the order of the requests. The order you want is:
- List Workspace
- Get Available Tasks
- Execute Task
Your Scenario is mostly ready but we need to populate the requests with details for authentication and specific parameters for your sample job.
Setting Up the Environment
When you imported your Orchestration and Processing Projects a default Environment was created for each Project. The Environment can be used to store common key-value pair configurations. The only such environment variable created by default was the BaseUrl property which points to the regional API endpoint, e.g. https://api.us.cloud.talend.com for the US region. But we will be adding a few more environment variables for things like your authentication token.
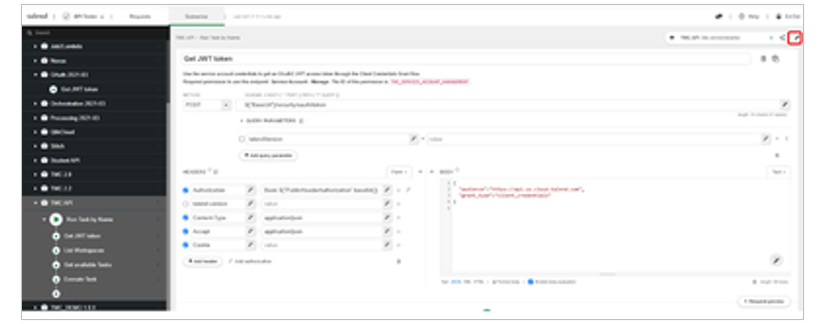
First, let’s copy our API project Environment into new Environment for our TMC API project. Select the Run Task by Name scenario if it is not already selected in the left-hand pane and click on the pencil icon in the upper right representing the Environment settings.
You are taken to the Environments editor dialog window. Click on Add an Environment.
Enter TMC API as the name for the new environment to match the name of the Project you created. Also, check the box marked ”Copy variables from” and select one of the environments created for the API projects you just imported, either Orchestration 2021-03 or Processing 2021-03 as before. Click the Create button to initialize your new environment with the same settings as those projects environments.
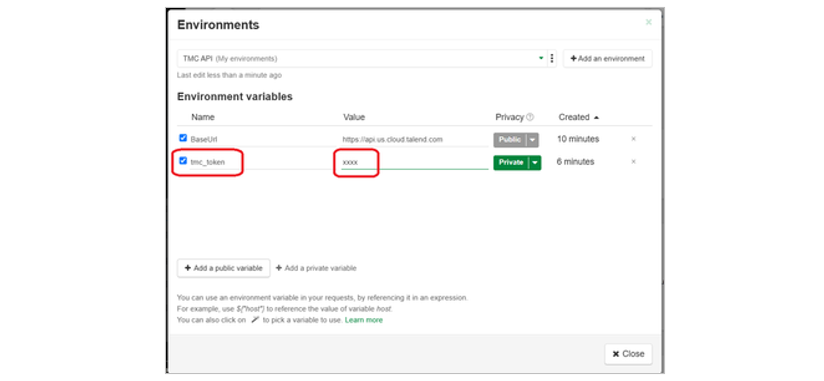
Your new environment is displayed and not surprisingly it starts off identical to the old environment. In addition to the BaseUrl configuration we are going to add the user token created earlier. We are going to create this as a Private variable. This is important because it means it is private to you. Other users using the Scenario will need to enter their own token.
Name the new environment variable ”tmc_token” and paste in the user token you created earlier. Then click Close.
Testing the Operations
We are ready to test each of the individual requests in our Scenario. As we progress, we will use the output of previous API calls as inputs to subsequent API calls.
List Workspaces
Start by testing the List Workspaces operation. Select the List Workspaces operation from the Run Task by Name scenario in the left-hand pane to edit it. In the right hand-pane add a request Header named Authorize.
Set the value of the Authorize Header to ”Bearer”. Note the space at the end of that string. After entering the Bearer prefix, click the little wand icon to the right of the edit box.
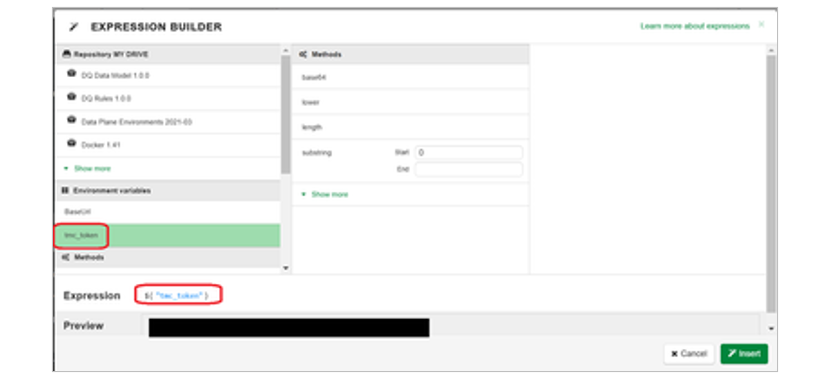
The wand icon opens the Expression Builder dialog box which allows you to reference environment variables or the response body of previous operations in the scenario.
Click on the tmc_token in the Environment variables section of the Expression Builder.
The Expression built for you is displayed in the lower section as well as a concrete evaluation Preview of the Expression in the current context. In the diagram the preview has been redacted since it is a sensitive value. Click Insert to return to the request editor.
In this case we just want an environment variable. We could have just manually entered
Bearer ${“tmc_token”}
But we wanted to use the Expression Builder with this simple example so we will be ready for the more complex steps later.
The result of the Expression Builder has been inserted into the value of the Authorize Header.
Note that although there is a Query Parameter it has not been enabled by the checkbox. As a result, the current request will return all Tasks in all Environments.
Rather than overwhelm ourselves with a potentially large result set, let’s check the box to enable the Query Parameter and modify the filter criteria to reference the sample Workspace and Environment we created in the Setup section. In the screenshot below we have used eost-dev as the Environment name and eost-lob1-dev as the Workspace name. Yours will be different. Note that there is a semi-colon separator between the two criteria in the query parameter.
name==eost-lob1-dev;environment.name==eost-dev
The documentation and hence the generated operation may have only a comma so you will need to modify it.
Finally, run the request by clicking on the green play arrow.
The results are displayed below the green arrow so you may need to scroll down.
The request output is displayed in Pretty format with collapsible elements. It can also be displayed in raw json format as shown below.
The result of the List Workspaces operation is an array of one element which is the eost-lob1-dev Workspace. It has a child element which is the eost-dev Environment. For both the Workspace and Environment there is an id property in addition to the human readable name. We will need the Workspace id returned from this operation as input to the next step.
Get Available Tasks
Select the Get Available Tasks operation from the Run Task by Name scenario in the left-hand pane to edit it. In the right hand-pane add a request Header named Authorize and set the value of the Authorize Header to ”Bearer ${tmc_token}” just like the previous request.
Check the box to enable the Query Parameter. There are lot of Query Parameter options for the Get Available Tasks. Check the boxes next to the environmentId, workspaceId, and name query parameters to enable them. The screenshot below shows the query parameters already populated, but they will initially be empty.
Click in the environmentId query parameter text field and then click the wand icon next to it to build the Expression to return the environmentId. The Expression Builder dialog window will be displayed. Use it to drill into the previous List Workspaces result to retrieve the Environment id.
On the left-hand pane of the Expression Builder there are different sections for Projects, Environment variables, and Global Methods. The Projects section has the title ”Repisitory MyDrive”. Find the TMC API project and click on it. In the right-hand pane you will see the expanded results, which include the Run Task by Name that you created. Click on it and you will se the different Requests you have created within the scenario. Click on the previous step, List Workspaces. Now drill into response->body->0. The 0 is the first element of the array that was returned as the response. Continue drilling into the environment->id elements. Since id is a string an additional drilldown is possible to further parse the string, but we do not need it.
The full drill down as well as the final expression are shown below.
Repeat this process for the WorkspaceId field. The drill down and final expression are shown below.
For the name field, just specify the human readable name of your sample Task. In the screenshots this has been tmc_sample_job but you can use any job you wish.
Finally, run the request by clicking on the green play arrow.
The request output is displayed in Pretty format with collapsible elements. It can also be displayed in raw json format as shown below.
The result of the Get Available Tasks operation shows tmc_sample_task. In addition to the human readable name property, the Task has a unique key which is the executable property. The Task has links to the Environment and Workspace as well as the underlying Job (Artifact). For both Workspaces and Environments there is an id in addition to the human readable name. We will need the value of the executable property returned from this operation as input in the next step.
Execute Task
Select the Execute Task operation from the Run Task by Name scenario in the left-hand pane to edit it. In the right hand-pane add a request Header named Authorize and set the value of the Authorize Header to ”Bearer ${tmc_token}” just like the previous request.
Unlike the previous List Workspaces and Get Available Tasks which were GET operations, Execute Task is a POST operation. It is creating a new Execution which is being appended to the list of active Executions.
Since it is a POST operation, we need to look at the Execute Task API documentation to understand the schema of the request body. The request body is an ExecutableTask. The ExecutableTask object has four properties: executable, parameters, logLevel, and timeout. We will only use the first three properties for our example.
In the Body of the request paste in the following json template.
We will use the Expression Builder to populate the executable property with the value returned from the previous Get Available Tasks Operation. First position the cursor between the two quotes for the executable value. Then click the wand icon.
Now navigate to the previous Get Available Tasks in the Expression Builder and drill into the desired executable property of the result. The drilldown navigation and the resulting expression are shown below.
After clicking Insert in the Expression Builder dialog window, the resulting request should like this:
Now it is time to enter parameters. Parameters depend on the Context Variables used by your job. Any Context Variable default values you have in your job are overridden by the Task configuration properties. Those Task configuration properties can in turn be overridden by the parameters specified in you API call. So if you are happy with the already defined defaults in either the Task or the Job you can omit the parameters property of the Request.
Parameters for your sample job will differ, but the tmc_sample_job example has just a single Context Variable called message which is a String. The request is shown below.
Run the request by clicking on the green play arrow. The result of the ExecuteTask operation is only a link to the ExecutableTask that was created.
The operation provides an asynchronous interface, so you can poll the status of the Task execution with the Get Task Execution Status operation which uses the exectionId as part of its path.
Running the Scenario
All three operations in the Run Task by Name scenario are now working and wired together. You can run the operations sequentially by clicking on the Scenario play button in the left hand side.
The API Tester will attempt to run each operation in sequence. New results for prior steps will be incorporated via the Expression Builder into subsequent steps. The outputs will be available in the individual operations to review.
Using a Service Account
Regular user accounts for humans use User Access Tokens which are static. In contrast, Service Accounts must generate temporary access tokens based on the oAuth2 Client Credential Flow. The temporary token itself can be generated by calls to the Get JWT Token operation of the TMC oAuth API. This example assumes that you already have a service account created with appropriate permissions to access your sample workspace as described in the Pre-requisites section.
Get the Service Account Temporary Token
From the TMC oAuth API click select the appropriate region for your Talend Cloud and then click Try in API Tester.
A new project named oAuth 2021-03 is created. Get JWT Token is the only one operation in the API. Click on the ellipsis next to the oAuth 2021-03 project and select Extract to Scenario.
Select the Get JWT Token operation by clicking on the checkbox and then click Extract To.
Navigate to the Run by Task Name scenario as in the previous sections and click Save.
The Get JWT token operation request has been appended to the Run Task by Name scenario.
Since we will need our JWT Service Account token for the subsequent steps, click on the Run Task by Name scenario and click the pencil icon to edit the scenario.
Move the Get JWT token to be the first operation using the up-arrow keys.
Notice that when you imported the oAuth API into API Tester the Environment was changed. The environment is shown in the upper right. Change the environment to the same TMC_API environment used for the other requests.
Now click on Edit Request for the Get JWT Token operation. Notice that the Authorization header for the request expects an Environment variable named PublicAuthorizationHeader.
As noted in the Generating a Service Account Token use case format Authorization Header needs to be the base64 representation of the service account id concatenated with a colon and then the service account secret. If you do not know the service account id you can look it up in the TMC from Users and Security -> Service Accounts as shown below.
You could also look it up programmatically using the Service Accounts API with the List Service Accounts operation.
In addition, the service account id, you need the service account secret. That was displayed when the service account was created, and you have it stored in a secure place, e.g. a secrets manager. If you have lost access to the secret you will need to generate a new service account.
With the service account ID and secret in hand you can create the Public Header Authorization environment variable. Click the pencil icon in the upper right corner to edit the TMC API Environment.
Add a new private environment variable called PublicHeader Authorization as shown below. Set it to plaintext (not Base64) value of <service account id>:<service_account_secret>. Note the colon between the two values. We will format this in base64 in the next step.
Back in the Get JWT Token request editor, select the Authorization header.
Prefix it with the word Basic. It should now read:
Basic ${“PublicHeaderAuthorization”}
Now we need to transform this to Base64 format. Click anywhere within the quotes surround PublicHeaderAuthorization and click the wand icon to use the Expression Builder.
The Expression Builder displays the PublicHeaderAuthorization environment variable. In the Methods column select base64. The resulting expression is shown below, as well as a preview of your base64 formatted service-account-id:service-account-secret pair. Keep in mind that base64 is just a format, not an encryption. So be sure that your environment variables are private and do not share even the base64 value. It is obfuscated, not encrypted.
The payload for the request is always the same. Substitute your API region (us, us-west, eu, ap, au) for the <env> placeholder below and place in the Body section of the form.
Now click on the green play arrow to execute the operation. The result is an access token in json format as shown below.
Note that the token will expire in 1800 seconds (30 minutes).
Using the Service Account Temporary Token
The new temporary Service Account token must be used for our subsequent queries. We will need to update the Authorization header of the List Workspaces, Get Available Tasks, and Execute Task operations.
Select the List Workspaces operation within the Run Task by Name scenario. Select the Authorization header, click within the quotes surrounding tmc_token and click the wand to open the Expression Builder.
The Expression Builder opens and displays the previously select tmc_token environment variable. We need to change that. Select the TMC API project from the left hand pane, and then the Run TMC Task by Name->Get JWT Token->response->body->access_token as shown below.
After clicking the Insert button, the new Authorization property should read
Click the green play arrow to execute the List Workspaces to verify that the new Service Account based invocation works. If you get an authorization error, double check that you have your service-account:service-account-secret pair set correctly in the environment, and that your service account has correct permissions on the Workspace.
For the Get Available Tasks and the Execute Task operations of the Run Task by Name scenario you can just copy-paste the same Authorization expression from the List Workspaces Authorization shown above.
Execute those operations as well to confirm the end-to-end test.
Running the Scenario
All three operations in the Run Task by Name scenario are now working and wired together. You can run the operations sequentially by clicking on the Scenario play button in the left-hand panel.
The API Tester will attempt to run each operation in sequence. New results for prior steps will be incorporated via the Expression Builder into subsequent steps. The outputs will be available in the individual operations to review.
For information about Qlik™, click here: qlik.com.
For specific and specialized solutions from QQinfo, click here: QQsolutions.
In order to be in touch with the latest news in the field, unique solutions explained, but also with our personal perspectives regarding the world of management, data and analytics, click here: QQblog !
