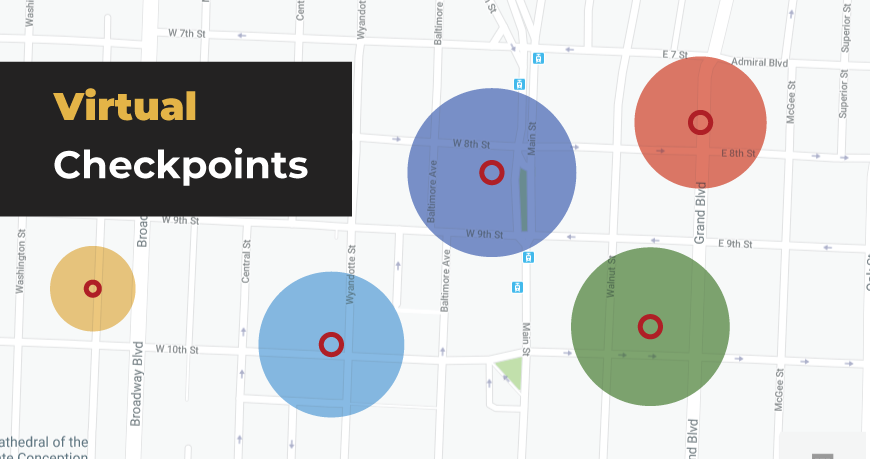
A new type of Checkpoint is now available - VIRTUAL CHECKPOINTS (only for GOLD)
Now, let’s see what a Virtual Checkpoint is! 🙂
A Virtual Checkpoint is a defined area (focal point with a range) where a Guard can perform a Scan or some other task (just like with QR-Codes, Beacons and NFC tags). So, you can use these Virtual Checkpoint as the rest of the checkpoint types (QR-Codes, Beacons and NFC tags). That means you can add them to schedules, your Guards may attach a virtual checkpoint to an MME and so on.
If the Guard’s device location is within the area defined for the virtual checkpoint, the system automatically sends a Scan Event for the checkpoint.
IMPORTANT: The location is device dependent – not application dependent! The accuracy of the location thus depends on the device as well as on the circumstances on the target area (GPS coverage).
Setting up the System - Defining Virtual Checkpoints
1. Navigate to Company -> Checkpoints.
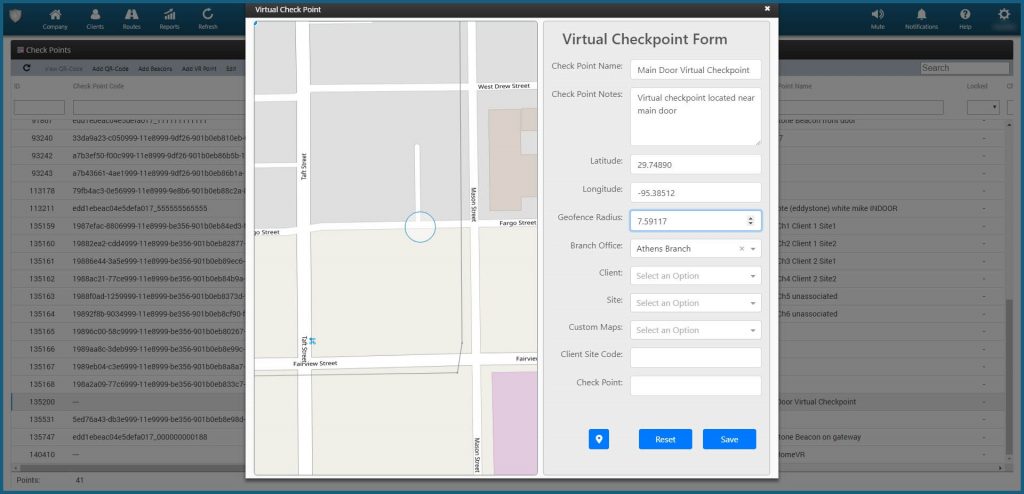
2 Press the “Add VR Point” link located on the Checkpoint panel – a new page will open to define the Virtual Checkpoint – most of the fields are common as with the rest of the checkpoint types (QR-Codes, Beacons, NFC tags).
3. Next, you need to define the coordinates and radius of the Virtual Checkpoint. You can do that by using one of the following:
a. Text Fields: insert the “Latitude”, “Longitude” and “Geofence Radius” (in meters) to define where the Virtual Checkpoint will be located.
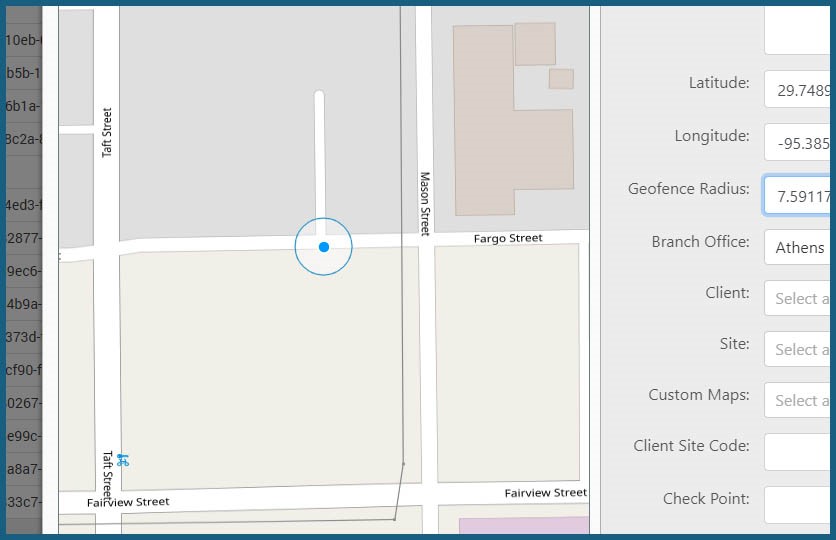
b. Map: you can make use of the map:
– Navigate (by right/left clicking on the map with the mouse and keeping it pressed) and zoom-in/out the map (until you find the location of interest).
– Click on the center of the area of interest (to define the Center of the Virtual Checkpoint Area).
– Move the mouse from the Center of the Virtual Checkpoint Area towards outside, until you reach the radius of your choice (like in the photo).
– You can adjust the Virtual Checkpoint defined area by moving the Circle on the map – by clicking on the center of the circle (the system will show the center) and while-clicked moving the circle with the mouse.
4. Fill-in the rest of the filelds (just like for QR-Codes, Beacons and NFC tags) and then press “Save”.
Setting up the System - Defining Guards Rights
The system allows you to select which of the Guards can make use of the Virtual Checkpoints feature, as well as how they can use them:
1. Navigate to Company -> Guards
2. On Virtual Checkpoints Scan section, select the Scan Mode you wish
3. For automatic Scan Mode, you to define the Auto Mode interval value too – the period that the system should re-send the same Virtual Checkpoint scan automatically
4. Define the Outdated Threshold – the period after which the mobile application will not allow Virtual Checkpoint scan events to be performed due to outdated location
5. Press Save.
Scan a Virtual Checkpoint
By pressing the Scan button, a new page appears, where the Guard can access the Scan Virtual Checkpoint page by pressing the respective button.
On the next screen, the Guard can select the client and the site they are interested in to filter checkpoints by client/site* or select one of the available nearby checkpoints from the list of all VR Checkpoints of the company and send the Scan event (by pressing the Scan Checkpoint button).
*Only available when Fetch client list option is enabled on the Guard’s settings in the Web App.


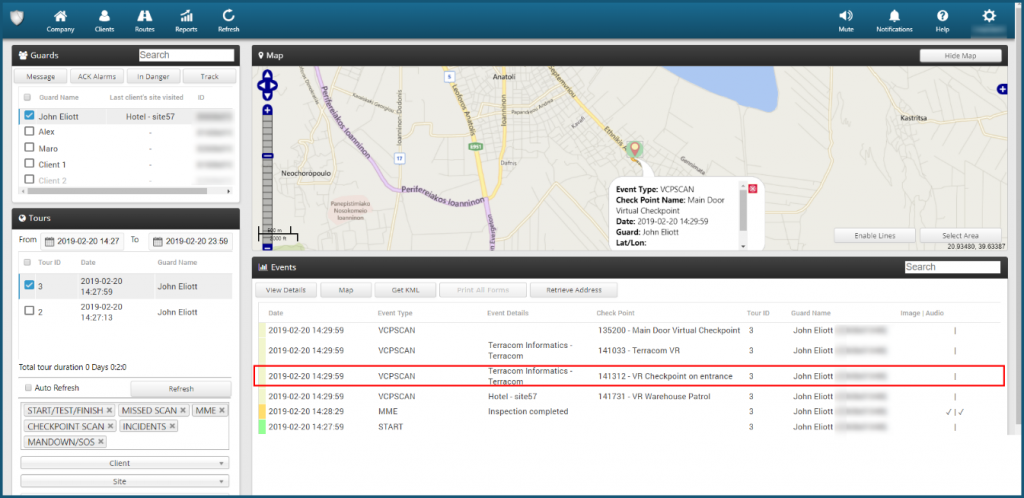
Viewing of Results
The system handles Virtual Checkpoints scans the same way as the rest of the checkpoint types includes them in reports, produces MISSEDSCANS if a Virtual Checkpoint scan as defined on a schedule has not been followed.
At the same time, it allows you to distinguish which scans are related to Virtual Checkpoints, as seen in the image: